


 Service") CRISPR/Cas9 (RGENs) Microinjection Service 基因敲除魚品系製作
CRISPR/Cas9 (RGENs) Microinjection Service 基因敲除魚品系製作
Zebrafish Microinjection Service:
Custom zebrafish knockout (gene editing)
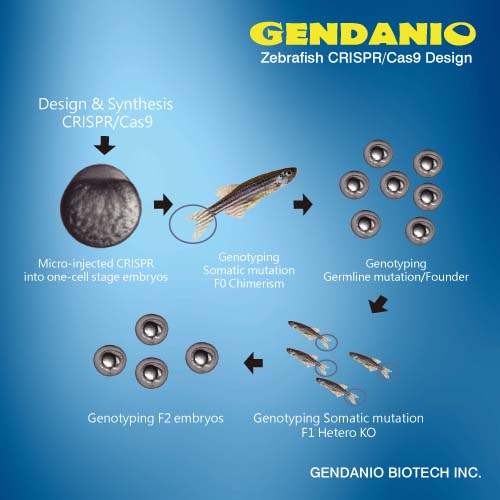
CRISPR/Cas9(RGENs) Knock-out/Knock-in一條龍服務流程:
- 給我們您感興趣的基因序列
- 專業人員序列判斷服務
- 合成CRISPR/Cas9 (RGENs) plasmid or mRNA mix
- 細胞感染實驗(Cell transfection) - in vitro DATA
斑馬魚胚胎顯微注射(zebrafish microinjection) - in vivo DATA
小鼠胚胎顯微注射-Coming soon(建立中) - 轉殖效率分析
- Genotyping (SNP, NGS)
如有服務問題請直接連絡我們。Case by case 專案處理。Email:
歡迎科研單位代工訂製 及 廠商代理服務:
同時可得到in vitro(Cell) data 和 in vivo(Zebra fish) data
專業交給我們~ DATA結果交給您!!!
CRISPR基因敲除 CRISPR基因剔除 斑馬魚胚胎顯微注射 基本代工服務 (Microinjection / Micro injection)
斑馬魚胚胎注射實驗服務,請先閱讀英文版Zebrafish microinjection protocol
標準流程:
- 斑馬魚卵收集
- 拉針及質體(Plasmid) loading注射準備
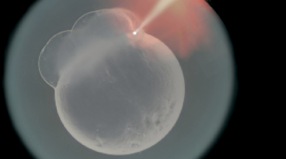
- 注射(microinjection)
- 保存觀察
- 分析
客戶需提供以下材料,或跟我們客製化訂購
1.注射材料(Meterial):
- Plasmid (linear form)
已酵素切開直線型,請萃取乾淨,不乾淨會影響魚隻存活率及轉基因效果 - DNA
- RNA(Morpholino)
- RNAi,
- shRNA
- CRISPR/Cas9 sgRNA,tracRNA (RGENs) -HOT!!!
- 其它材料
2.健康的斑馬魚至少10對以上:
- GENDANIO養殖場提供 A/B Strain Zebrafish
或 - 客戶自行提供
3.注射時間:
(1) 需要在1cell 時期內(受精後10-20分鐘)即打入材料(Meterial)
請儘量能提供魚隻給我們,由我們的研發部直接操作(可簽保密協定防止魚隻外流)。
如無法提供魚隻只能在貴單位上機操作,注射設備由我們自己帶去貴單位,請貴單位準備好流程1及流程2之所需物品,如
- 注射質體預混顯色劑
- 魚隻(前一天準備好二母一公於產卵盒,公母分開於避光室/暗室,溫度28.5度C)
- 解剖顯微鏡一台
- 排列卵的Agar plate(或前一天預注泠藏)
(2) 其它stage注入(請參考Zebrafish larve development stage)
請儘量能提供魚隻給我們,由我們的研發部直接操作(可簽保密協定防止魚隻外流)。
8小時後才做microinjection內可由專人於貴單位收取受精卵。
觀察結果:
- 注射後需保持28.5度C上下(標準狀況置於恆溫OVEN)
- 如於本公司操作顯微注射,將於隔日挑出存活卵以28.5度C左右送至貴單位
- 不保證存活率及轉基因效率(詳見注意事項)。
注意事項:
顯微注射效率影響:質體不乾淨將嚴重會影響魚隻存活率及轉基因效果
存活率影響:質體乾淨度、產卵之公母魚的營養狀況。如客戶端
- 注射為Wild type(A/B zebrafish),公司端自備魚卵材料,客戶端無須準備。
- 注射非Wild type(A/B zebrafish),如公母魚的營養狀況不良,須將魚隻寄養本公司,營養充足後使得操作。或客戶端自行餵食豐年蝦或推薦之飼料,提升營養程度。
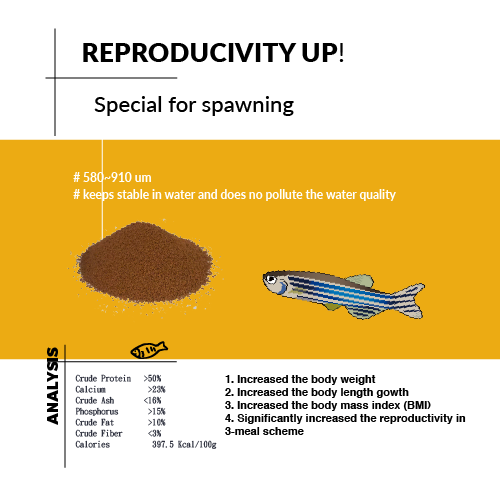
市售之一般魚飼料(粉)非斑馬魚產卵專用配方飼料,不建議客戶端用於實驗使用,產卵效率低。
理想狀況有八成~九成以上的轉基因效率,CRISPR/Cas9 Knockout (KO) 約30%~60%成功率。全部流程全部在台灣服務。
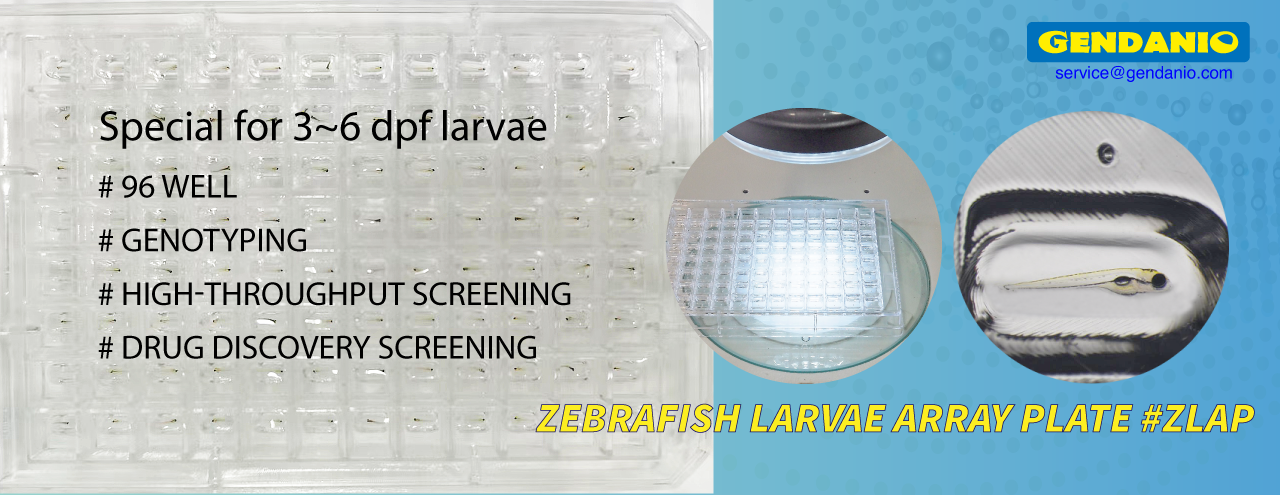
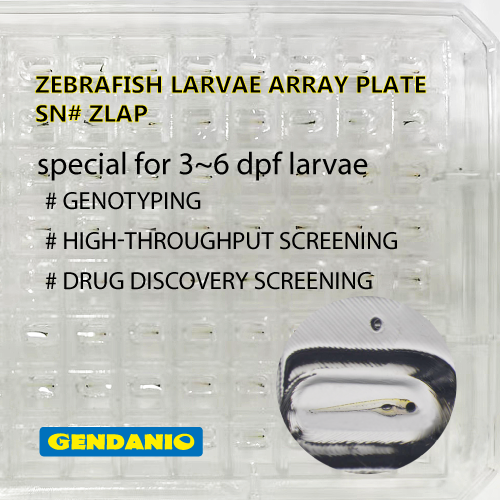
Zebrafish larve development stage:
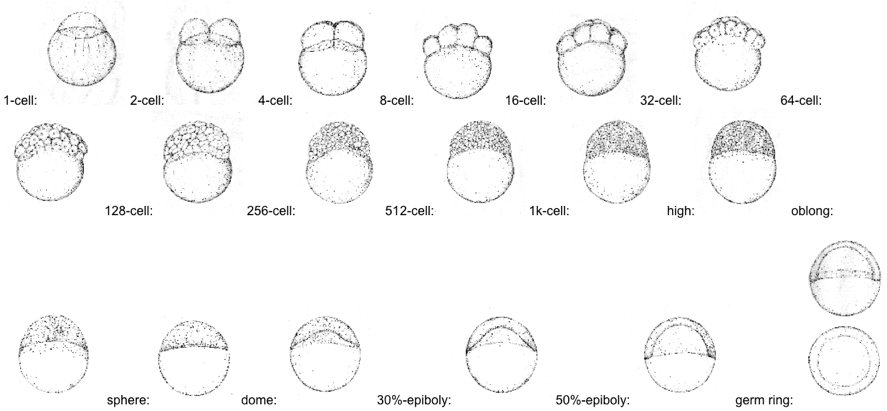

Kimmel et al., 1995. Developmental Dynamics 203:253-310
Zebrafish microinjection protocol
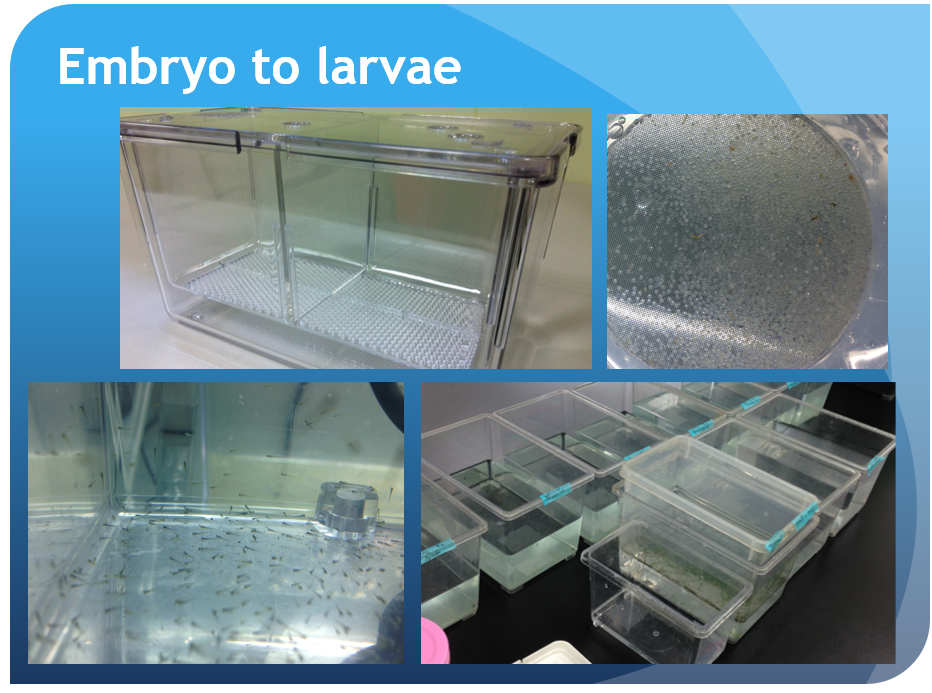
Part 1: Egg production and collection
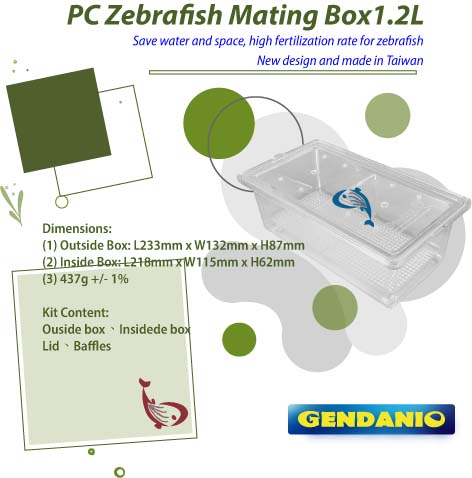
- The night prior to injection, set up the fish in breeding tanks with dividers in place. To increase total egg production, fish can be set up in a ratio of two females to one male if desired.
- The following morning, after the room lights turn on, pull the dividers from several tanks and allow for approximately 20 minutes of undisturbed mating time.
- Using a strainer, collect the eggs from the breeding cages and rinse them with egg water. Pour eggs into a Petri dish with egg water and remove unfertilized eggs and debris with a transfer pipette. Fish can be regrouped in larger tanks to produce additional rounds of eggs for injection. Adjust the timing of egg collection to allow for maximum numbers of eggs to be produced without letting them pass the single cell stage.
- Place a microscope slide in the inverted lid of a 100mm Petri dish. Use a transfer pipette to line up the eggs against the side of the slide forming a single column. Remove excess egg water from the slide by pressing a Kimwipe against the side opposite the eggs.
Part 2: Needle pulling, loading, and preparation
- With a micropipette puller, pull a 1.0mm OD glass capillary into two needles and store in a 150mm Petri dish by laying over silly putty ramps. Needles can be pulled in advance.
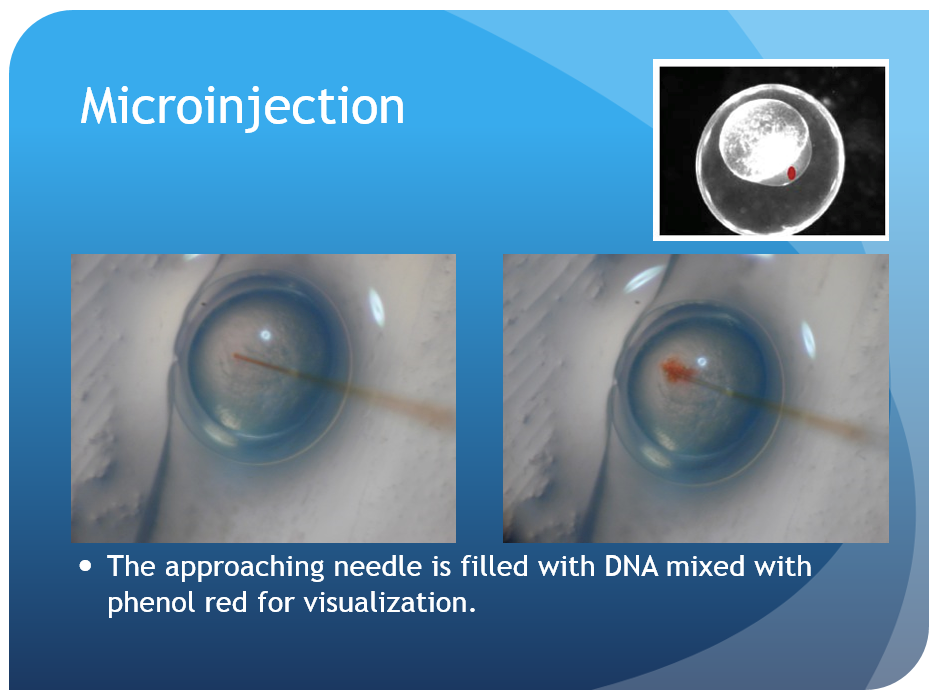
- Backload the needle with 3 μL of injection material using a microloader pipette. Shake the bolus toward the needle tip until there are few or no bubbles remaining.
- Turn on the air source and microinjector. Insert the needle into the microinjector and insure a tight seal within the housing. Check that the micromanipulator is in a proper position to allow for a wide range of movement and adjustment. Bring the needle tip into the plane of view of the microscope, high off the stage, and focus on the thinnest region of the tip. Use a pair of sharp forceps to pinch off the needle at a point which leaves the needle narrow enough to pierce the chorion and yolk but still capable of delivering a consistent bead size. A drop of mineral oil on a micrometer can be used to calculate the volume of each injection. When injected into the oil, a bead with a diameter of 0.1 mm contains 500 pL of injection material; injection volumes of 500 pL or 1nL are typically used. Depress the foot pedal and monitor the size of the bead while trimming the needle and adjusting the injection pressure as needed. Ideal injection volumes will fill approximately 10% of the egg volume. The quality of the needle tip is crucial to both the ease of injection and the quality and consistency of the results.
Part 3: Injection
- Ensure the embryos have not developed past the four-cell stage. Ideally, embryos should be at the one-cell stage.
- Lower the needle toward the column of eggs, holding the dish in place with your opposite hand.
- Pierce the surface of the chorion and enter the yolk in one smooth stroke while watching for any crushing or tearing of the yolk sac. Inject the injection material into the yolk. Avoid injecting air bubbles or stretching the yolk as either can be lethal to the embryo. Working down the line, adjust the pressure as needed to maintain a consistent bead size and, using a pipette tip, remove eggs which look unfertilized or are destroyed during the injection process.
- After completing a column of eggs, use a gentle stream of egg water to move the injected eggs into a clean Petri dish. Repeat as necessary. Keep several uninjected embryos as a control. At the end of day one, remove dead embryos and record the number of injected embryos. Replace the egg water in the dish periodically to reduce the chance of infection.
Part 4: Representative results
Depending on what is being injected, embryos may survive at a lower rate than their uninjected siblings. Fortunately, it is easy to inject huge numbers of them, so this is rarely a problem. It is normal for morphants to exhibit slightly delayed development.
Part 5: Observation:
- Phenotype
- Select with fluorescence
- Genotyping
- Next generation sequencing(NGS)
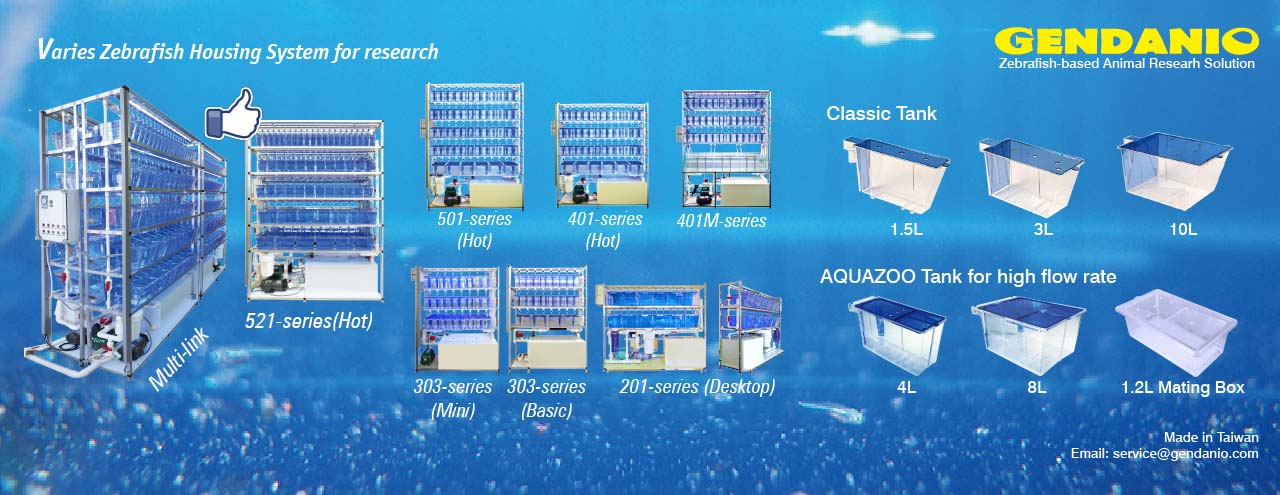
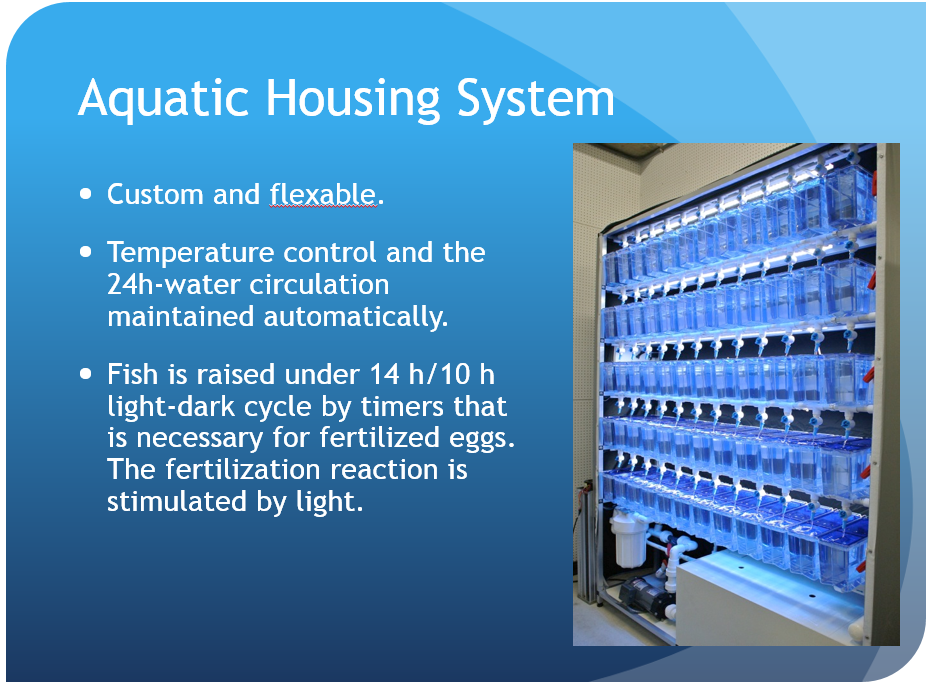
Aquaculture system suggestion:
GENDANIO(Model-CL) ,AQUAZOO(Model-AZ)

Aquaculture system and microinjection service
Contact:
EMAIL: